Category Archives: Drinks/Healthy Snacks

Liberating French Fries

I had a hankering for french fries this past weekend. Like I HAD to have them. And I’m not even a big french fry person-I am SO picky about french fries. They must be thin, crispy and light feeling. Not burnt and not chewy-gross! I also try to avoid any kind that you can get through a drive-through, and I have never seen any advertised in a restaurant that says they were cooked in a HEALTHY oil.  The affordable frozen pre-made variety are always only so-so and usually have nasty things in them like trans-fat, msg, etc. So, I generally just don’t eat them.

But we were grilling up some fantastic grass-fed cheeseburgers this weekend and I told my husband that I MUST have french fries. I think I was tempted originally by a recipe over at The Cheese Slave and decided that I had to give it a try. We have made french fries that were fried in olive oil before and baked in the oven but they never compared to that boardwalk fries taste I was going for.  So I decided to give french fries fried in grass-fed tallow a go.

Here is a bit of information about why animal fats are in fact good for you (in moderation) as opposed to vegetable oils in “The Truth about Saturated Fatsby Mary Enig, PhD, and Sally Fallon:

Before 1920 coronary heart disease was rare in America; so rare that when a young internist named Paul Dudley White introduced the German electrocardiograph to his colleagues at Harvard University, they advised him to concentrate on a more profitable branch of medicine. The new machine revealed the presence of arterial blockages, thus permitting early diagnosis of coronary heart disease. But in those days clogged arteries were a medical rarity, and White had to search for patients who could benefit from his new technology. During the next forty years, however, the incidence of coronary heart disease rose dramatically, so much so that by the mid fifties heart disease was the leading cause of death among Americans. Today heart disease causes at least 40% of all US deaths. If, as we have been told, heart disease results from the consumption of saturated fats, one would expect to find a corresponding increase in animal fat in the American diet. Actually, the reverse is true. During the sixty-year period from 1910 to 1970, the proportion of traditional animal fat in the American diet declined from 83% to 62%, and butter consumption plummeted from eighteen pounds per person per year to four. During the past eighty years, dietary cholesterol intake has increased only 1%. During the same period the percentage of dietary vegetable oils in the form of margarine, shortening and refined oils increased about 400% while the consumption of sugar and processed foods increased about 60%. Check out the rest of the article, it’s very information packed.

So here is the actual recipe for 5 very generous servings:

  • 5 clean ORGANIC russet potatoes-scrub them clean and cut into small french fry shapes. The thinner the better in my opinion, but it’s up to you
  • About a quart of grass-fed beef tallow (rendered beef fat-check your local beef farms, you can easily render your own tallow from the fat, I’ve just never done it before) OR expeller pressed coconut oil
  • Sea Salt
  • Filtered water for soaking
  • Lined cookie sheet

The How to:

According to The Cheese Slave who got it from another book, it’s recommended to soak the cut potatoes in water for at least a half an hour before frying and to double fry. It is supposed to make for a crisper fry. That’s what I did and the results where perfect. So start off by soaking your freshly cut potatoes in filtered water for at least a half an hour, they will expand some. While they are soaking heat your tallow up in either a deep fryer or a heavy bottomed stainless steel skillet like I used. You want to make sure that you heat up the tallow very slowly or it will smoke. You don’t want it to smoke so go very slowly. Now go ahead and line a cookie tray with parchment paper because you will be frying the potatoes in small batches and you need to keep them warm until you do the second frying.

One the tallow has slowly warmed up to about 350 degrees or even up to 450 and your potatoes have soaked you can begin the frying process.  Make sure that the potatoes are dried completely before frying them. Now you can add a small batch of the potatoes to the tallow and allow it to fry for about 5 mins, moving the potatoes around every now and then. Once the time is up, remove them from the fat and put them on the cookie sheet, and place it in the oven to keep warm. Now simply repeat this process until all the potatoes are fried the first time, making sure to allow the tallow to heat back up between batches. You want to make sure that the fat is hot enough so that it boils pretty well while the potatoes are frying-otherwise you just end up with soggy fries-yuck.

Once you have gone through the first round of frying, just repeat again in small batches until you have double fried them all. The second time may take less time-you want the fries to look sort of brown. Once you are done just season them with as much sea salt as you like and serve right away! You will be in french fry heaven-I promise!

This recipe is Shared at Pennywise Platters Thursdays 5/12Fight Back Fridays 5/13 , Primal Friday #2, Weekend Gourmet Blog Carnival 5/16, and Monday Mania 5/16


How to Grow A Scoby-Kombucha Making

Maybe you killed your scoby, or perhaps you don’t have one and want to try to brew your own Kombucha tea. Either way as long as you have some K-tea from a previous batch (always keep at least some tea in a tightly closed glass jar in your fridge for a back-up) you can re-propagate your own scoby.  This method works best if your tea has a few thread looking things in the tea. They look pretty ugly but they can easily grow into a new baby (or is it mother?) scoby.

Scoby, by the way, merely stands for a “symbiotic colony of bacteria and yeast” and is not just limited to Kombucha. The same term can also used when talking about kefir grains-both milk and water. And we are talking about HEALTHY bacteria and yeast. The stuff that your gut desperately needs to keep your immune system functioning at optimal health. Good bacteria is especially vital after an anti-biotic regimen which unfortunately kills off a lot of the good bacteria as well as the bad.  Kombucha tea, kefir, even yogurt to a lesser extent are all teaming with different strains of pro-biotics that your gut and butt (pro-biotics also helps elimination and even bloating in many circumstances) desperately need. The yeast helps to control bad yeast that can lead to yeast infections,thrush, and some other nasty yeast over-growth that can lead to a myriad of health problems. So, feed your gut different forms of healthy bacteria and yeast and you will notice and overall increase in your lymphatic systems (immune) ability to fight and control infection over time. An added bonus is that drinks like Kombucha and Kefir are also very delicious and easy to prepare! Have fun with this health tonic-check out my kombucha punch recipe!

So…what is this post about again? Oh right, how to make a scoby from a previous batch of kombucha tea. This is very long and complicated so please be patient. Only kidding, this is fool proof and simple!

Here’s what you do:

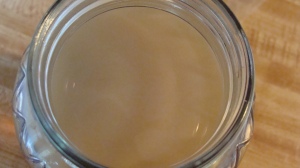
Take a glass jar of K-Tea and place a coffee filter over it. Fasten it with a rubber band and let it sit in your kitchen in a semi-warm location for about 1-2 weeks. You will eventually begin to see a thin white substances forming at the top of your jar which is your scoby!

Once it grows to about an inch thick you can go ahead and a fresh batch of Kombuca Tea! Check out my video tutorial on how to make K-tea and you can see that the clean off-white looking scoby. I used this method to grow it myself. Easy peasy!

This is what it looks like from the top after it forms


Kombucha Punch


So, we had Taylor’s 5th birthday party this past weekend and I wanted to serve a fun punch that could be for both adults and kids. I wanted to use my Kombucha as the base of the punch. I was honestly a bit nervous about it because I didn’t want to get in a lengthy discussion about it at my kids birthday party, so I was pretty vague about what it was. I did talk a bit about the benefits of Kombucha such as it being detoxifying and generally good for us. I ended up just calling it “a healthful tonic” which is pretty accurate if you’re trying to keep it simple. So I made up a super simple punch that was very pretty and I’m not going to lie, I put some peach snapps beside it and let the adults add it to their punch. Uh…YUM! That’s all I’m gonna say about that one.

So here’s what you need:

  • About 1-2 qts. Kombucha (this batch was made with half green tea, half black)
  • 1 bottle Organic Pomegranate and Cranberry Juice
  • Half of 1 orange
  • 1 Lemon/Lime
  • ice

The How to:

In a pretty pitcher just pour the kombucha and the juice in and then add the fruit, giving it a good squeeze before hand to get the juice in the punch. Add the ice and stir it gently and serve! Easy!


This recipe is posted at the Hearth and Soul Blog Hop #46-Premeditated Leftovers

And also posted on Far Above Rubies Domestically Divine Homemaking Tuesday Linkup

And at Simple Lives Thursday May 5th-Sustainable Eats


THE Best Granola. EVER.

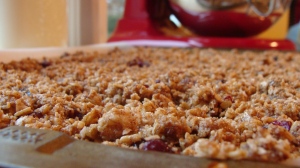
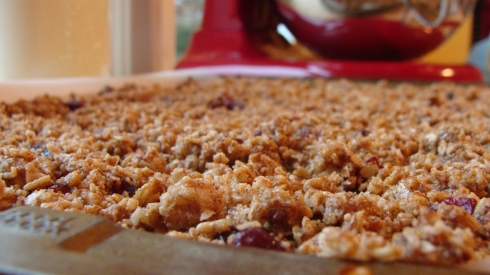
After my post last week in which I claimed that I had the best granola recipe EVER, I thought that I better post the actual recipe so you can see if you like it as much as we did!  (oops!) Remember this teaser pic?

YUM!

Ok, so not to toot my own horn here but my granola turned out SO good this time! I”m not sure if it was because I actually took the time to soak the oats and nuts or perhaps the added salt really helped to pronounce the flavors more- doesn’t matter because it was gooood!

I love being able to have a healthy cereal on hand on those mornings (or snack times) when you are running a bit behind or just enjoy the convenience of cereal without all the processed, empty, and EXPENSIVE ingredients that are in the boxed cereals. Did you know that manufacturers can claim that their products are “trans- fat free” if they have below .5 grams PER SERVING of trans- fat (hydrogenated oils)? I find that amazingly disgusting. Read your labels and you will see that they do indeed contain trans-fats and they just make the serving size smaller so they can legally claim that. ” Fake food” foulness to its fullest. (say that 5 times as fast as you can)  So….why not make your own super healthful and super delicious cereal?

This recipe was inspired by my very good friend Lisa Gale but I tweaked it and also added the beneficial soaking step that’s really very easy. Even easier if you  have a dehydrator. It’s very important to soak your grains and whole grain flours, even your nuts! While nuts have a slightly different reason for soaking, the benefits for doing so are significant. Your body can digest the grains and nuts so much better and you get SO MUCH more nutrition out of it. So why not take an extra 10 mins. the night before to do it?

You simply soak the oats in 1 part water with an acid solution such as whey, yogurt, buttermilk, etc., and 3 parts oats combined with about 1/2 cups whole grain flour of your choice. Say you have 3 cups of rolled outs, you would use 1 cup of an acid solution. That can be water with about 3-4 tbls. vinegar or lemon. You could also use a full cup kefir or plain yogurt. So for this recipe, you use 4 cups of oats and about 1 1/3 cups acid solution. It doesn’t have to be exact. Just be sure to add about ½ cup whole wheat flour to the soaking oats to facilitate the phytic acid break down. Your oats will be damp but not soaking wet or anything.

Let that soak for 12-24 hours then dry it out in your dehydrator at about 135 until dry or in your oven set as low as it can go. The drying only takes a few hours. I will post a more in-depth tutorial later. For the nuts you soak about 4 cups in a brine solution.( About 2 tsp. and enough water to cover the nuts) Dry the same way as you do the oats. Oh and they also tastes a lot better this way too!

Ok, enough talk…lets get to it right?

You need:

  • 4 cups rolled  oats (soaked and dried always preferred)
  • 1 cup walnuts (soaked and dried)
  • 1/2 cup freshly ground  flax seed (you can use your coffee grinder or high powered blender)
  • 1/3 cup grade B maple syrup (best flavor and more nutrition)
  • 1/3 cup coconut oil-melted
  • 1/4 cup grass-fed butter-melted
  • 1/2 cup raw honey
  • 1/2 cup coconut flakes
  • 1 generous Tbls. cinnamon
  • 1/2 tsp. sea salt

(My friend adds a bit of ground ginger, I haven’t done that yet but I bet that’s good too!) Update: I tried 1/4 tsp. of good quality ginger and it was fantastic!

Extra Add-ons include: dried cranberry’s (YUM), dried apricots, raisins, dried mango, other seeds or nuts. We use dried cranberry’s or raisins and sometimes apricots and mango!

The How to:

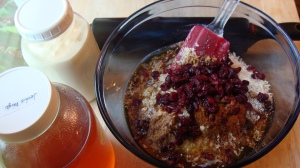
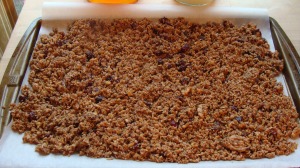
Now combine all of the ingredients and mix everything very well in a large bowl and spread on a cookie sheet lined with parchment paper. I would suggest doing this in at least two batches because you want the layers to be pretty thin so it doesn’t take all day to dry them out a bit. Now, I like my granola a bit on the crunchy side so I tend to bake it slightly longer so the final product isn’t too chewy. But you can experiment with how crunchy you like it. Just note that the granola does crisp up quite a bit as it cools-so don’t OVER cook them. I haven’t experimented with drying it in the dehydrator yet but I would imagine that it would be the most beneficial option-health wise as it would keep the beneficial enzymes in your raw honey intact but this is pretty healthy too! If any of you have tried this, please let me know how it turned out!

So, after  you have spread out the granola on the lined cookie sheets, just pop it in a 250ish degree oven for 15-30 mins depending on your desired crispiness level. Just be sure to check it every few mins or so after the first 12 mins so you don’t burn it!

Now let it cool completely (if you can!) and store in an air-tight container until you are ready to eat it! I love it the best with cold raw milk…mmm! This makes about 4-5 cups of granola.

This recipe is posted over at The Hearth and Soul Blog Hop 

and also seen on Simple Lives Thursday Blog Hop #41 and Made from scratch Tuesday


THE Granola!

Your search for THE perfect Granola Recipe is over. End of story. Stay tuned for the how to…


Kefir Soda?

You betcha! I do love little reminders on why soda is so bad for you. Not that I never drink it, it’s just very rare. I don’t even like it all that much to be honest. Wonder why…
I’m waiting on some water Kefir Grains to make “soda”. I’ve never tried water kefir before so I’m very excited. This is yet another reason to avoid drinking regular soda ala Cheese Slave:
I’m waiting on some water Kefir Grains to make “soda”. I’ve never tried water kefir before so I’m very excited. This is yet another reason to avoid drinking regular soda ala Cheese Slave: I’m waiting on some water Kefir Grains to make “soda”. I’ve never tried water kefir before so I’m very excited. This is yet another reason to avoid drinking regular soda ala Cheese Slave.


How to make Kombucha Tea-A Video Tutorial

So I’ve never done a video tutorial before. Ever. This is my first one! Please excuse my nervousness.

One thing I need to clarify is that you add 2 more quarts of water after you pour in the concentrated tea/sugar into the fermenting jar or bowl. (Remember to ONLY use clear glass) This will also bring the tea mixture down to room temperature relatively quickly so you don’t have to wait as long to add the water.

Also, make sure that what you use to cover the fermenting container with the clean and white only. A clean white tea towel works, as does a coffee filter.

Here is the basic written recipe:

4-7 bags ORGANIC green or ORGANIC black tea ONLY-no flavored or herbed tea or even Earl Grey. Just plain old black or green ORGANIC tea. (using non-organic tea can cause your scoby to mold (I usually use 3 bags of each, but feel free to experiment, just make sure to include at least 1 black tea bag)-In the video I couldn’t remember why it is that you need at least one black tea bag, and according to Betsy Pryor of Laurel Farms who is all Kombucha, all the time you need some tannin in there which is found in the black tea)

1 to 1/2 cups organic granulated sugar (or white sugar)

3 qts filtered water (well water or distilled preferred)

1 Kombucha Scoby

1 fermenting container large enough to hold about a gallon. ie. clear gallon size jar (can use an old pickle jar), or a large clear glass bowl. (If you use a bowl make sure you also have a tea towel or cheese cloth and a large rubber band to cover. I prefer using the gallon jar as it’s MUCH easier to harvest the tea in my opinion.

1-2 cups Kombucha Tea from a previous batch or 2 cups distilled white vinegar

How To:

This is very easy, doesn’t take much longer than just making tea. Make sure that before you begin everything is sterilized. This is very important so you don’t introduce any bad bacteria to your K-Tea brew.

So you boil about a quart of water and then let it steep with the tea bags for at least 15 mins. You can go longer too but just be sure to add the water to the tea while it’s hot so it will dissolve all the way.

Then you can add the tea mixture to the fermenting jar and add about 2 more cups water. Make sure the mixture is at room temperature before adding any of the Kombucha Tea or the Scoby.

One the tea has cooled, you can go ahead and combine the two cups of Kombucha Tea from a previous batch, or however much came with your scoby or vinegar if you got a dehydrated scoby. Then add the scoby itself making sure that the flat smooth side is on top.

Now you just add either a coffee filter, tea towel or cheese cloth fastened with a rubber band. Place in an undisturbed quiet draft free location for about a week. You can begin to taste test the brew after about 4 days depending on the ambient temperature in your house. The warmer your house the faster it will ferment. K-Tea is ready when most of the surgar has been converted and you are left with a slightly tangy or even vinegary taste. The longer you let it brew the more vingeary tasting it will be. So it really depends on how you like it.

I will post another video tutorial on how to harvest the tea and do a continuous ferment and how to take a break from brewing your Kombucha Tea. Enjoy! And remember to start off slowly with the tea as it does have a detoxifying effect. General recommendation is about 4-6 ounces per day.

Have fun with it!


Kombucha Tea is the Coolest

I started making Kombucha last summer and have since gotten away from it. It’s easy to do things like that when your life is so busy. Well I killed my scoby (symbiotic colony of bacteria and yeast) a while back because I knew I wanted to take a break from it. And here is just another one of the reasons that Kombucha is the coolest. I did keep some of the tea in my fridge for oh…lets not try to remember how long, and I wanted to see if I could re-culture a Mother (our would it be a baby?) myself. This has happened before when I have done a double fermentation by just leaving it out on the counter after transferring the scoby for a new batch. I wasn’t sure how well it would work though, seeing as it’s been a long time since I’ve messed with it. But I figured hey, can’t hurt anything right? So, I took out my quart size mason jar of the tea, placed it in a safe quiet place and topped it with a coffee filter and just let it be for about a week.

And low and behold…my tea grew a baby! And not just any baby (or mother?) but one that looked PERFECT for making a fresh batch.  I am about to test it out and make a gallon size batch and I will check back with the results. I was pleased as punch.

And for those of you who have NO idea what on earth I am talking about here is a quote from the site Seeds of Health on some of the nutritional benefits of drinking Komubucha Tea (it tastes amazing too! Has a slight fizzy tang to it):

One of the main reasons why Kombucha seems to be efficacious against such a wide spectrum of diseases is that it does not have any specific action on particular illnesses, but rather its systemic detoxification of the whole body through glucuronic acid has an overall beneficial effect that invigorates the entire person…….. The following effects may be observed in those who drink the beverage on a daily basis: regulation of intestinal flora, cellular strengthening, detoxification of the entire organism, dross elimination, metabolic harmonization, a general antibiotic effect, a balancing of the blood pH.
The History and Spread of Kombucha
By James Roche

Some of the health claims are:

In rats it’s been shown to protect against stress and improve liver function. There is a lot of experiential evidence from people who have been using kombucha over many years. Many of the benefits reported include improvements in energy levels, metabolic disorders, allergies, cancer, digestive problems, candidiasis, hypertension, HIV, chronic fatigue and arthritis. It ‘s also used externally for skin problems and as a hair wash among other things.

The Main Reason why it is so good for you is because of the vast array of organic acids that help your body do it’s work.

Glucuronic acid –helps your body to detox itself (so start off small if you’ve never detoxed, or if it’s been a while (I learned this the hard way) Also helps with keeping your joints flexible (arthritis), and those who suffer from allergies

Lactic Acid– It’s a byproduct of how your body metabolized energy. It’s also created when you work out. Know that sore feeling you get when you lift weight…that’s a build up of lactic acid that hasn’t been processed back your blood stream. (but don’t worry, kombucha won’t make you feel soar AT ALL) Lactic Acid helps to keep you regular and also plays an important role in how your body balances pH. (think electrolytes)

Acedic Acid-helps prevent harmful bacteria from spreading (which I would assume is also why the bacteria in the scoby stays healthy)

Usnic Acidnatural anti-biotic

Malic Acid– liver detox

Gluconic Acid– helps with yeast issues such as thrush and candidiasis

Butyric Acid works with gluconic acid to further aid in yeast infections such as candida. Also plays a role is protect your body’s cellular membranes

( A lot of the information above was taken from “Seeds for Change” but please poke around and learn more about. You will be surprised how much info. you will find)

Even if it weren’t for all of the health claims, Kombucha tastes really good.  You can even really have fun with it. We made a punch out of it at my daughters birthday party and everyone loved it! It’s very refreshing and makes you feel a little bit “clearer”. It’s hard to explain if you’ve never tried it. I will be putting up a separate recipe soon with how to make it using black tea, green tea, and a combination of the two. Kombucha Tea is pretty awesome. At least I think so!

Edit: Check out my video tutorial on How to Make Kombucha tea and a basic written recipe!